Overview
1. Introduction
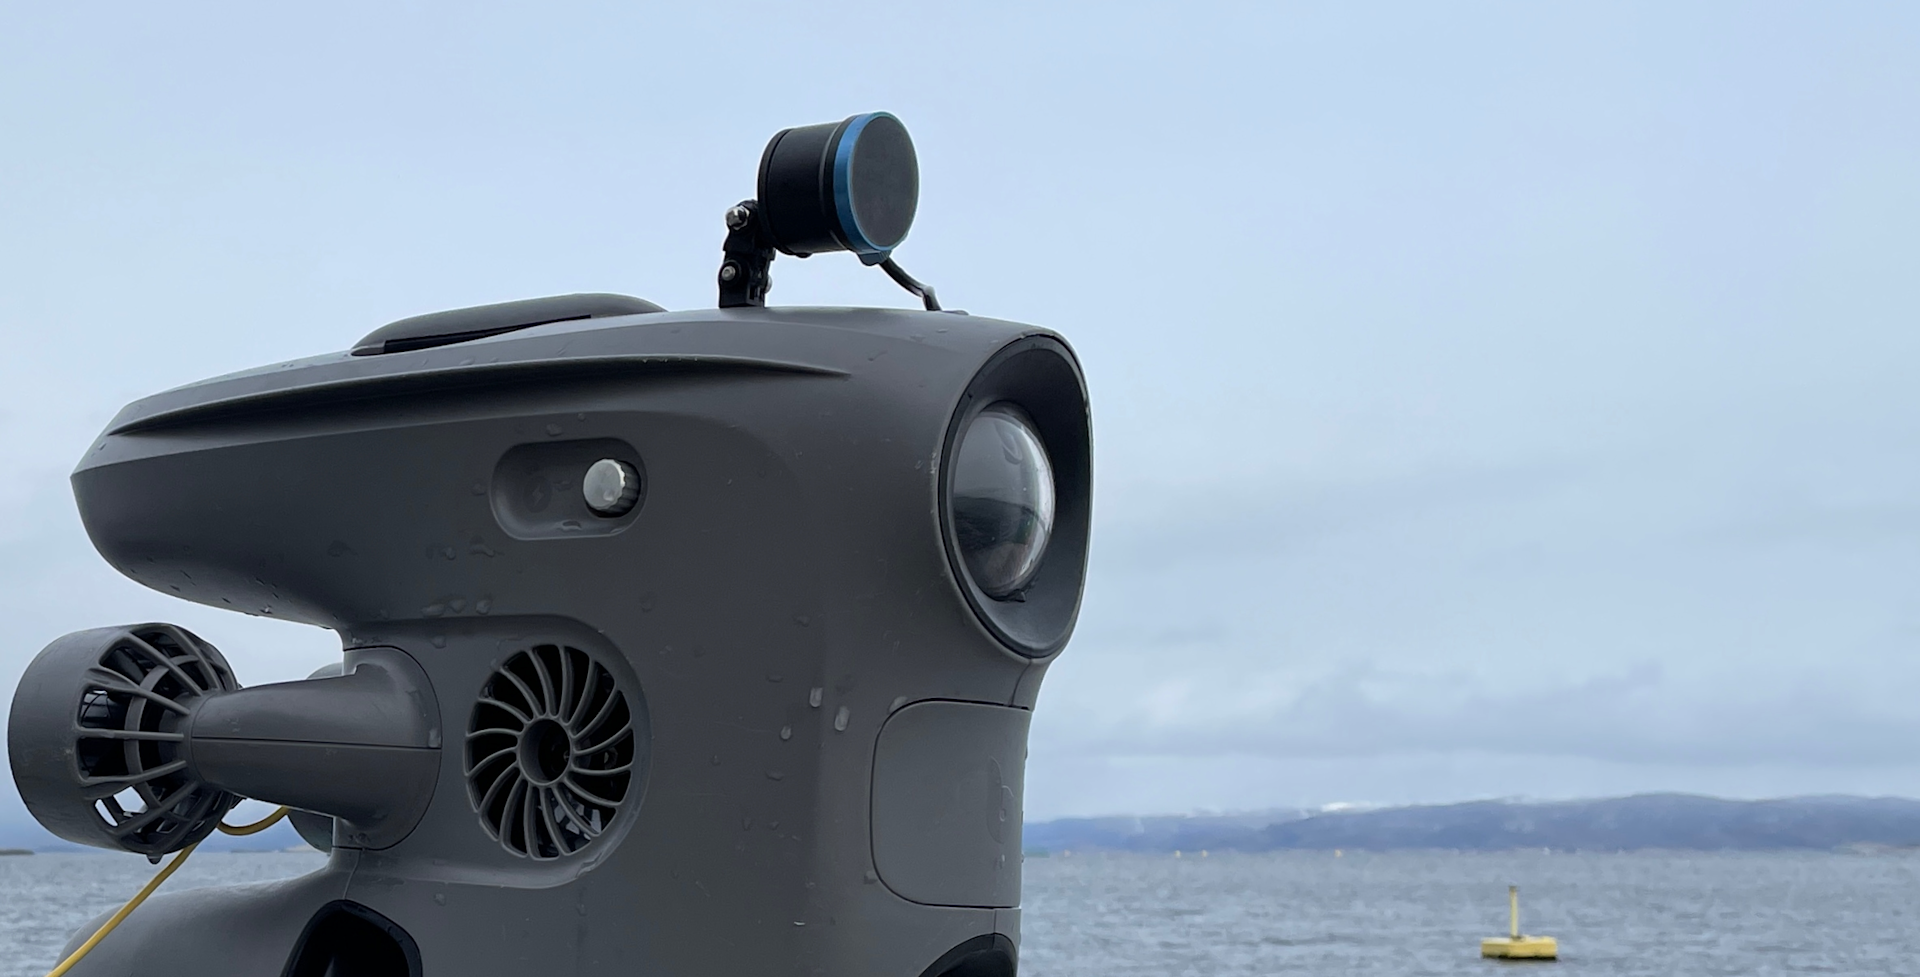
The Ping Sonar Altimeter and Echosounder is a sensor that is measuring the distance to the seabed or an object in front of the sensor. The sensor can be mounted in any direction, but it is most common to mount it facing forwards or facing downwards. The transducer (underwater speaker) has a beam angle of 30 degrees and a maximum range of 50 m. The minimum range it can measure reliably is 0.5 meters. If you go closer than this, you'll get faulty readings until you increase the distance again. If the sensor is mounted facing downwards, you'll get the new feature auto-altitude. This allows you to keep a constant distance from the seabed while diving in uneven terrain.
2. How to install
The Ping Altimeter and Echosounder is communicating via RS232 which is available on all Guest Ports (GP1, GP2, GP3).
In the box
The Ping Altimeter kit box comes with 2x Extra o-rings, 2x Zip-ties, 1x Self Adhesive zip-tie mount, 1x Mounting bracket with the Ping sensor and smart connector ready to install, and 1x Blueye steel skid.
Also included in the package: 4x Camera canister buoyancy for custom configuration (see more info further down the article).
Downwards configuration
Pinger mounted to downwards to measure the altitude, enabling auto-altitude.
Steps:
- Power “off” the drone.
- Remove the battery cover.
- Unscrew the 3 screws that hold the side covers and open it.
- Remove the buoyancy so you can see the Guest Ports.
- Slide off the ballast weights.
- Slide in the mounting bracket with the Ping sonar attached. (Cable should be pointing forwards)
- Clip the Steel skid onto the mounting bracket.
- Route the cable up the Guest port area.
- Check that the connector has o-rings and that they are clean and lubed.
- Select any of the 3 guest-ports and connect the cable with the screw.
- Use a zip-tie to tidy up the cable routing, using the zip-tie moint from the box.
- Put the buoyancy back on. If you are diving with multiple external equipments you may need to add the 4x Camera canister buoyancy (More info further down).
- Close the side covers. Make sure the cable is routed out through the bottom mount-slot and that cable is not squeezed before popping the side covers back on.
- Put the battery cover back on.
- That's it, due to our smart connectors, no configuration is needed.
Always check that the drone floats before diving! Seawater and freshwater have different densities, and front canister buoyancy is provided to compensate for the difference. Also if you are diving with multiple external equipments, you may need to add the additional camera canister buoyancy .
Forwards configuration
Pinger mounted to measure the distance to what's in front of the ROV.
Steps:
- Power “off” the drone.
- Remove the battery cover.
- Unscrew the 3 screws that hold the side covers and open it.
- Remove the buoyancy so you can see the Guest Ports.
- Install the Blueye universal strong mount above the Guest Ports.
- Attach the universal mounting adapter to the Pinger with the (M3) screws in the kit.
- Select any of the 3 Guest Ports and connect the cable with the screw. Check that the connector has o-rings and that they are clean and lubed.
- Guide the cable towards the mount-slot at the top.
- Attach the Pinger onto the GoPro mount on top of the ROV.
- Close the ROV, and make sure no cables are squeezed.
- Power on the ROV.
3. How to use
Once the Pinger is installed you just open the app and open Settings in the lower right tab. Then head to Drone settings and Configuration. Under "BR 1D Pinger" you can choose if the Pinger is mounted facing downwards or forwards.
Facing forwards
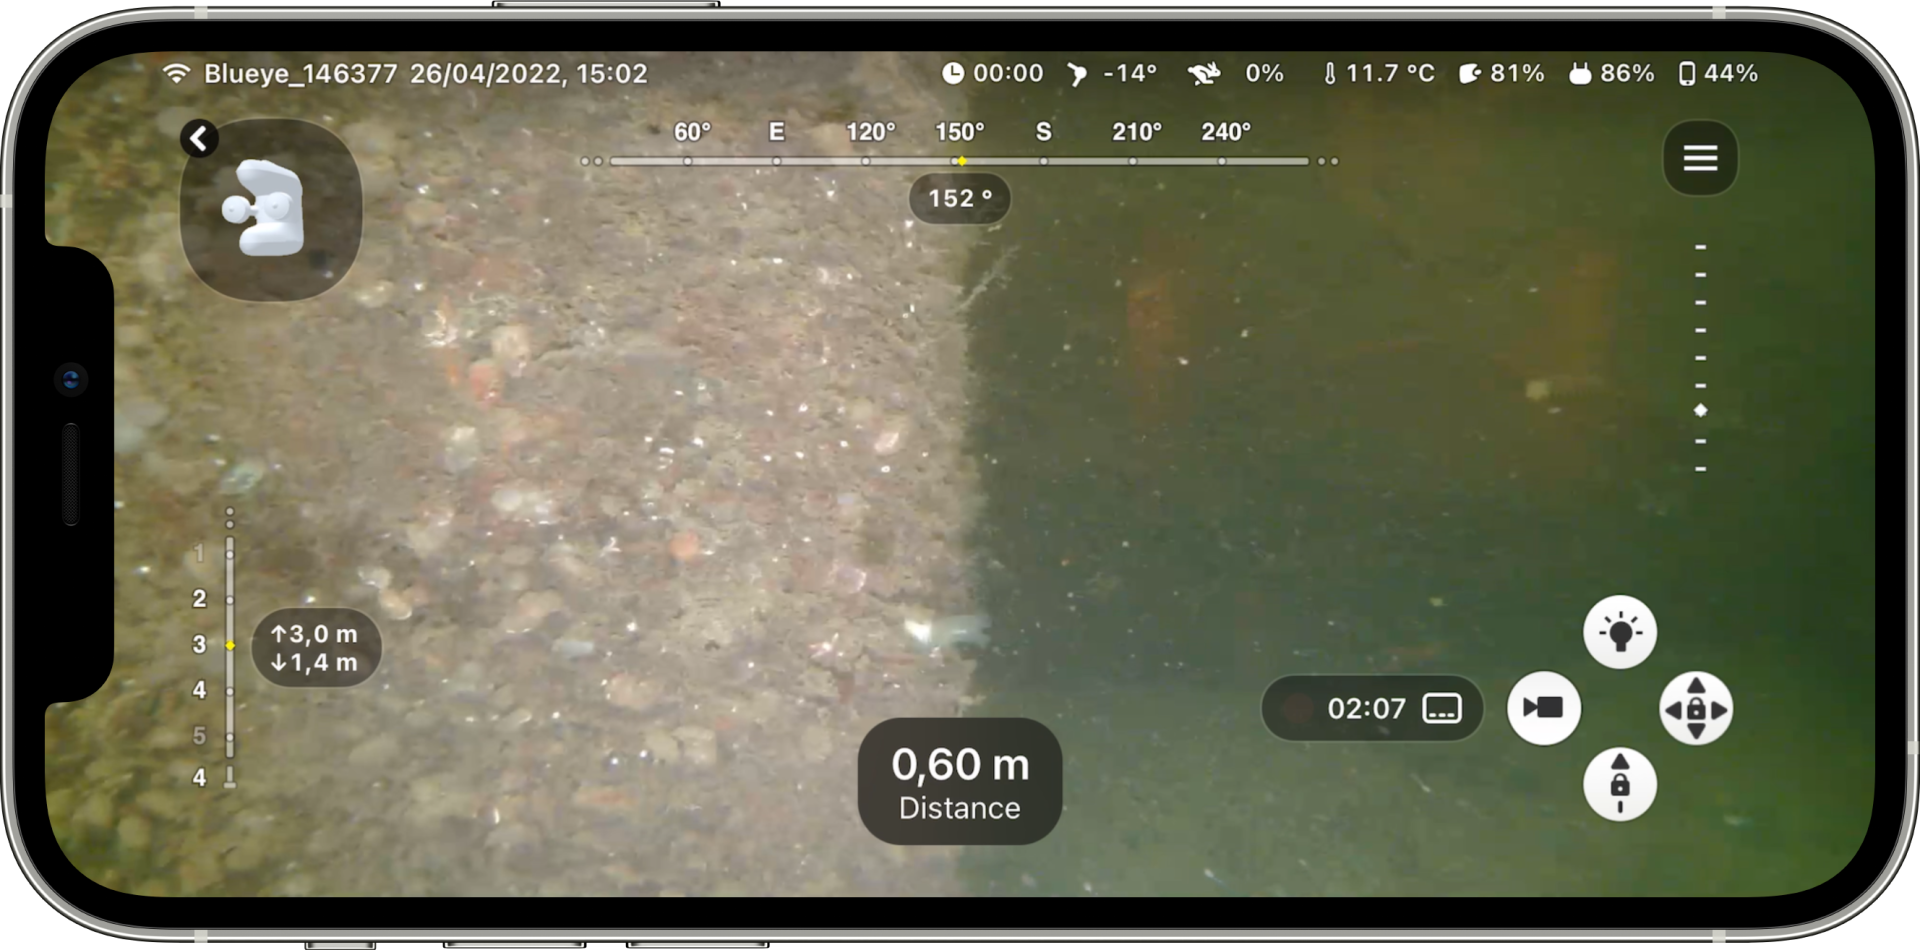
If you have mounted the Pinger facing forwards, you will get see a new text box appearing at the bottom of the screen when you enter the diving view. The reading will only be visible once there is a valid reading from the sensor. You can try to place your hand underneath it just to get some data.
Facing downwards
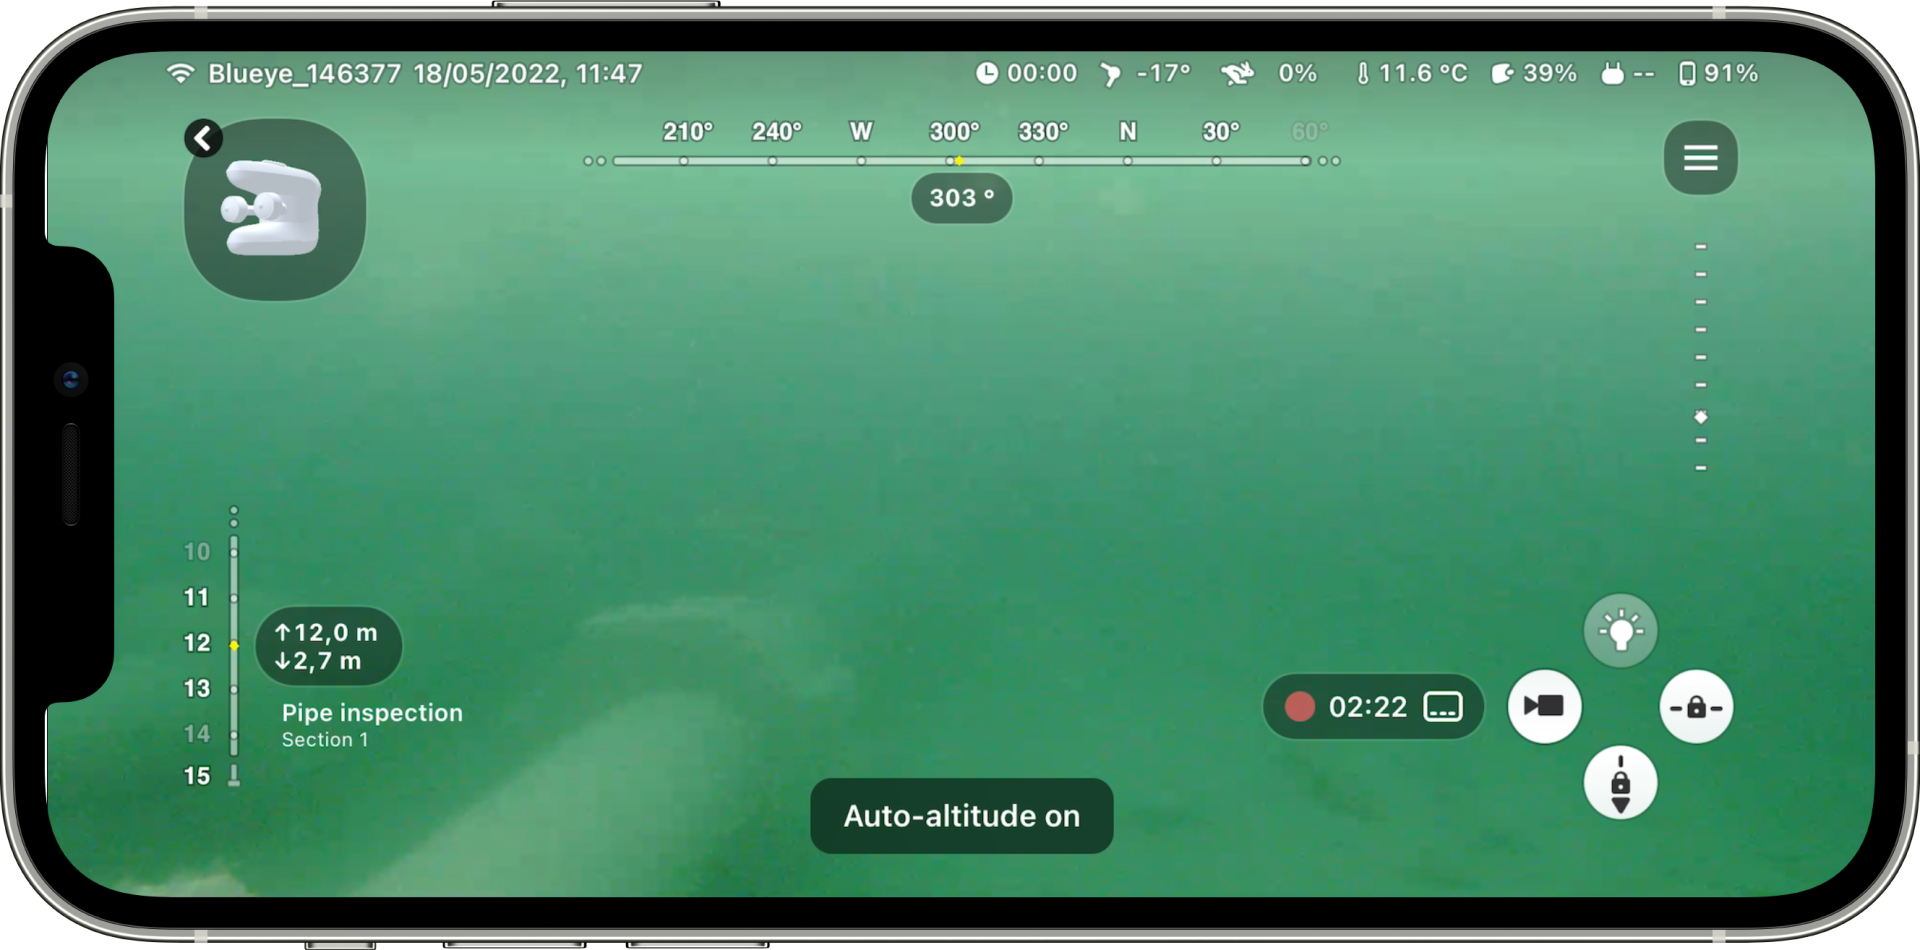
If the sensor is mounted facing downwards you will see the distance to the seabed displayed right below the depth indicator. This is also only visible when the reading is valid. Once you see a value in the altitude indicator you can activate auto-altitude by clicking the auto-depth button (A) 2 times. The (A) button will cycle through the modes, auto-depth, auto-altitude, and manual.
If you dive closer than 0.5 meters, the ROV will automatically change from auto-altitude to auto-depth. This is due to the unreliable values we get when we are closer than the minimum distance of 0.5 m.
Comments
0 comments